1.购买htttps证书后,下载https证书,选择tomcat下载,如图

解压后可以看到keystorePass


2.将解压后的pfx文件放置到云表的安装目录下
\Latosoft\LatoServer\Bin\Tomcat\conf
3.配置\Latosoft\LatoServer\Bin\Tomcat\conf路径下的server.xml文件。
打开server.xml文件,找到如图所示这一处
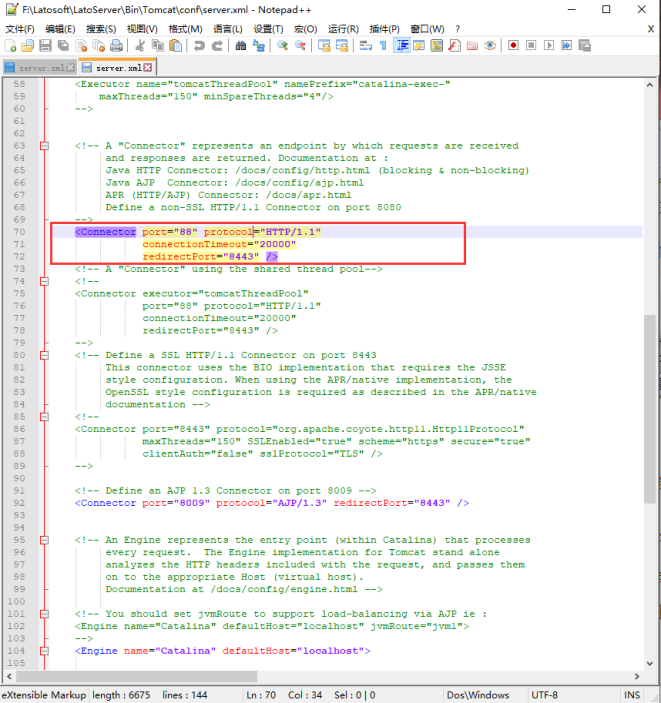
改为:

然后找到如图所示这一行(如果没有,则跟着上面一行后面新增一行)

改为:

注意:括号中的根据相应情况进行填写,其他信息不用改变。此示例中使用的端口号为:8443,
若想使用其他端口号,则要在配置的这两处进行修改(此端口号不能被占用),如图

4.上述配置配置完毕后,重启云表服务器即可生效,此设置后原http地址,与https地址均可以登录,若想不再使用http进行登录,则可以配置重定向,在访问http地址时自动跳转为https地址。
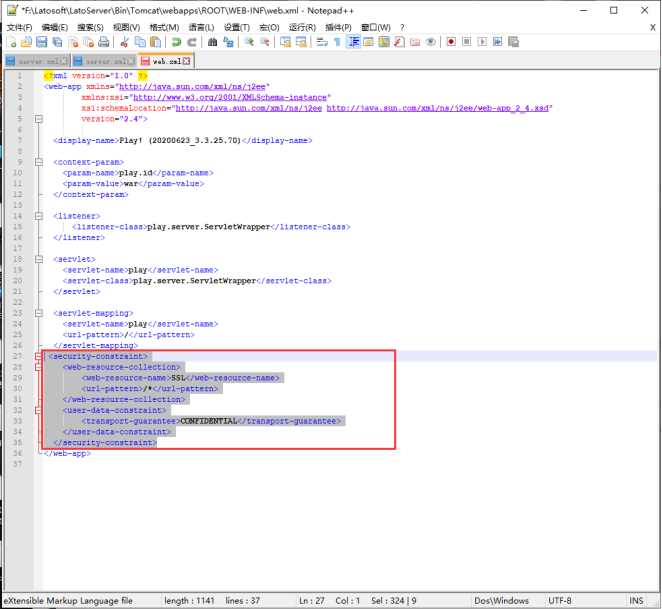
找到下面路径中的web.xml文件
\Latosoft\LatoServer\Bin\Tomcat\webapps\ROOT\WEB-INF
打开web.xml文件,在如图所示位置加上,然后重启云表服务器。
SSL /* CONFIDENTIAL
如图所示